Why Google Sites
A portfolio's job is to let someone else — a college admissions reader, a panel at your PBAT, a future employer — see your strongest work without you standing next to them explaining it. Google Sites is free, works with the same school account you already use for Drive and Classroom, and every file you'd put in it (documents, images, even embedded Slides) is already sitting in your Drive. Building it is mostly drag-and-drop, no code required.
Starting a New Site
Go to sites.google.com and pick Blank site — the templates (Club, Class, Event) are built for other purposes and fighting their layout to make it look like a portfolio wastes more time than starting clean. Name it something a stranger could recognize as your portfolio, not "Untitled Site."
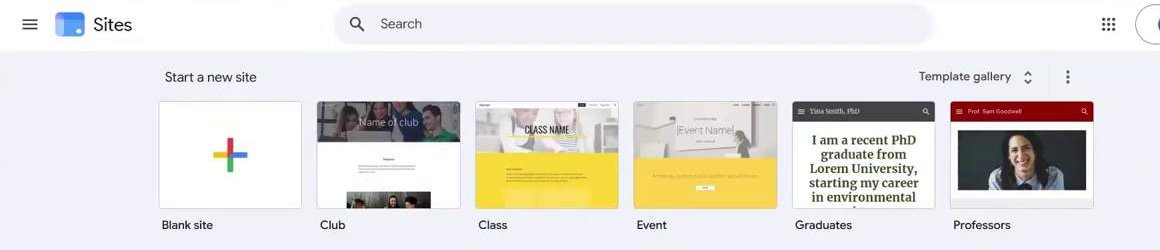
Start here: Blank site — the leftmost option, a plain white square with a colored plus sign.
Adding Content: The Insert Panel
Everything you place on a page comes from the Insert tab, on the right side of the editor. Text box and Images cover most of a portfolio on their own; Embed drops in something from another Google tool (a Slides deck, a YouTube video, a Doc) as a live, scrollable window instead of a static screenshot; Drive inserts a file straight out of your Drive without needing to download and re-upload it first. Below those, Content Blocks are pre-built layouts (image-and-text, image grids) that keep a page looking clean without manually lining anything up.
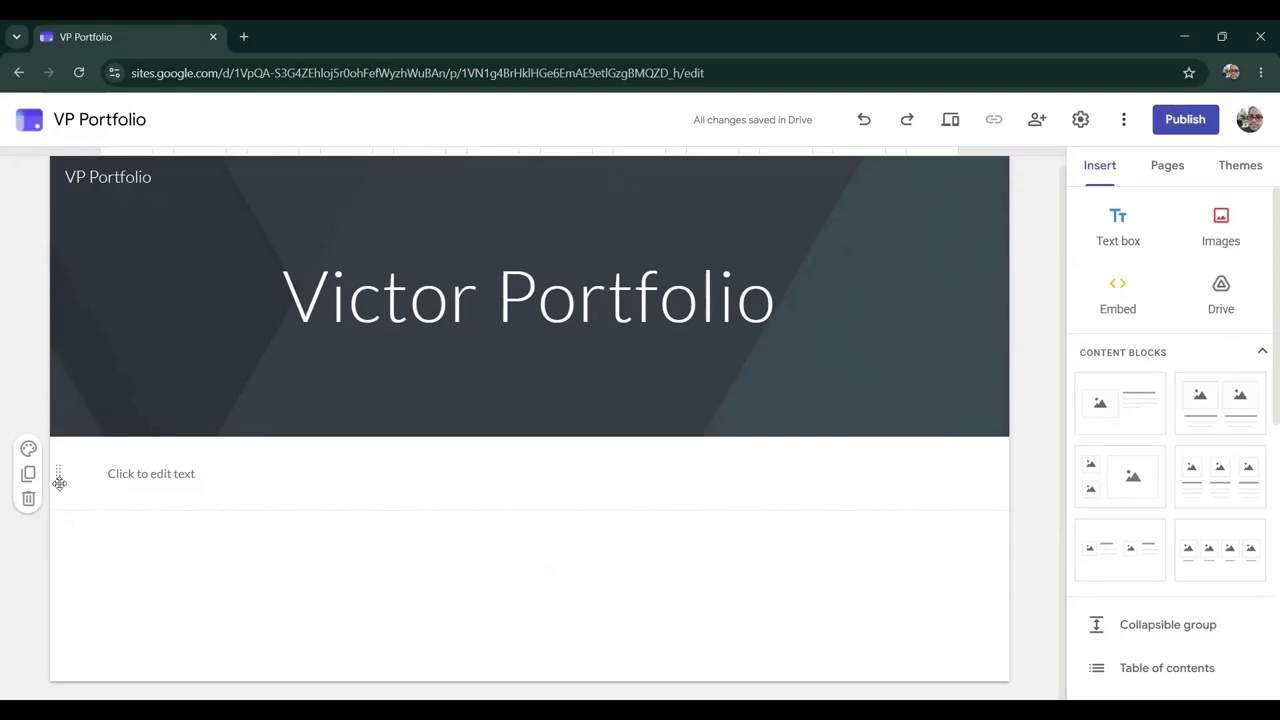
A real portfolio's home page, mid-build — the Insert panel on the right is where every piece of content on the page comes from.
Click any text on the page to edit it directly, right where it sits — there's no separate "edit mode." The floating toolbar that appears controls Styles: Title for a page's main heading, Heading and Subheading for everything below it. Using these consistently (not just making text bigger by hand) is what makes a multi-page site look like one coherent site instead of several different pages someone made on different days.
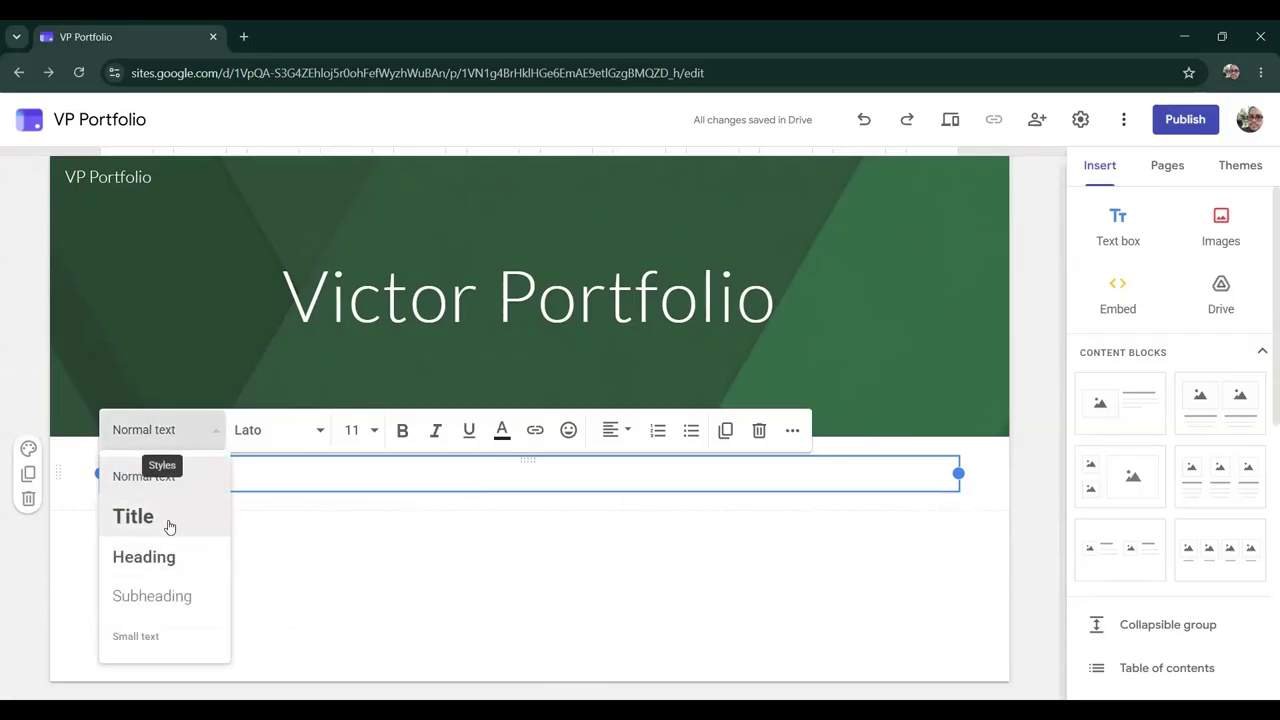
Click any text, then use Styles — not manual font-size changes — to keep headings consistent across every page.
Adding Pages
A one-page portfolio works for a handful of pieces; more than that, and separate pages per category (Photoshop Work, Illustrator Work, Client Projects) make it easier to browse. Switch to the Pages tab and use the + button in the bottom-right corner for New page — a fresh blank page added straight into your site's navigation menu, no extra setup.
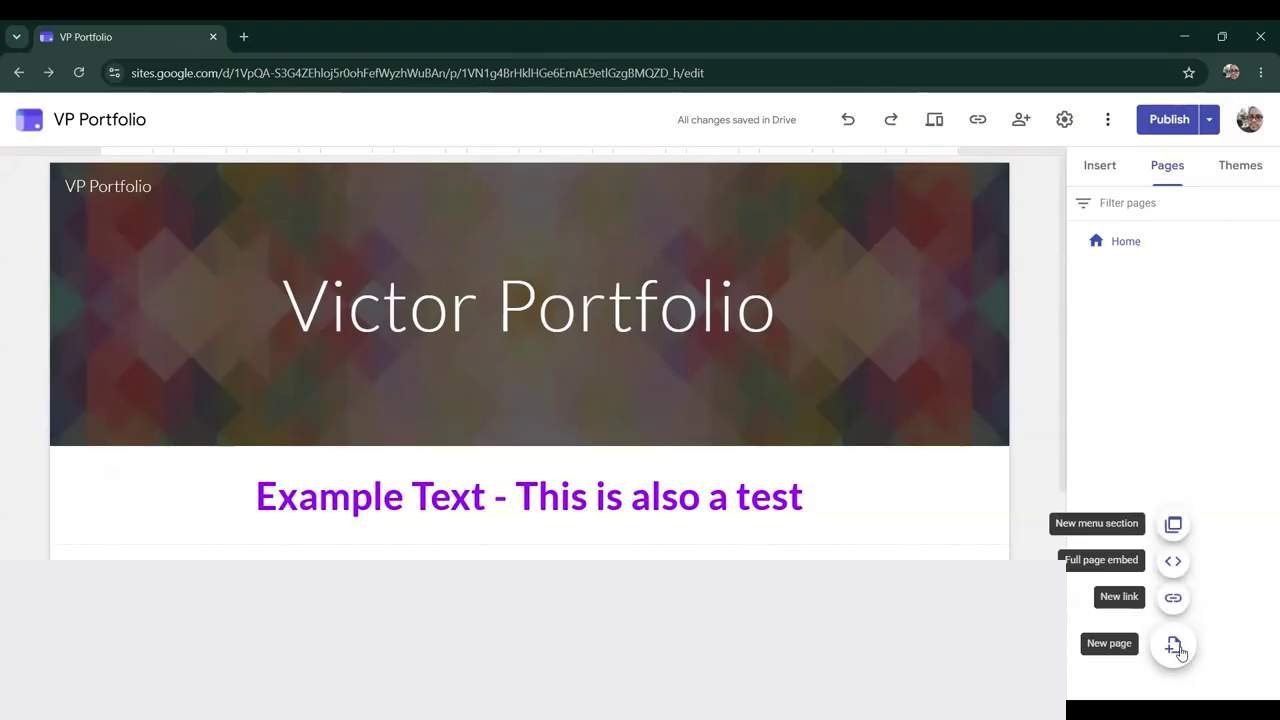
The Pages tab, with the + menu open — New page is the one you'll use most; the others (New link, embed, menu section) are for special cases.
Publishing: Draft vs. Public
This is the single most important thing to understand before you share your portfolio's link with anyone outside class: everything you build stays a private Draft until you click Publish. A Draft is only visible to people at your own school who already have the link; a Published site is genuinely public — anyone on the internet who has the link can open it, whether or not they have a school account.
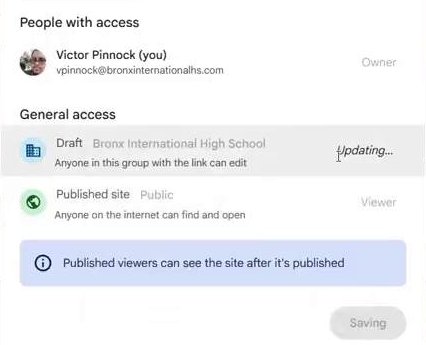
Real settings from a real site: Draft stays inside the school; Published site is public to anyone with the link, worldwide.
Before publishing, ask: does every piece of work on this page belong to me, and am I comfortable with a stranger seeing it under my name? Once it's public, treat the link the same way you'd treat any other public profile — it's worth a final look through every page first.
Before You Publish: Checklist
- Every page uses Title/Heading/Subheading styles consistently — no manually resized text pretending to be a heading.
- Every image actually loads — click through each page once, slowly, checking for broken images or placeholder text left behind.
- Each piece has a short caption: what it is, what tool(s) you used, one specific thing you learned making it.
- Click Publish, then open the published link yourself in a private/incognito window — that's the only way to see exactly what a stranger will see, not what you see while logged in and editing.