Purpose
A lot of students start this class having barely used a desktop computer before — phones and tablets work differently. This page starts at the very beginning: what the physical parts are called, how to use a mouse and keyboard, and only then, basic file management, browser use, and CTE at Bronx International. Nothing here is assumed to be already known.
🖥️ Meet Your Computer
Our classroom uses desktop computers: a few separate pieces that all plug together, instead of one single device like a phone. Here's what each piece is called and does.
Try it: at your own station, point to and name each of the 4 parts out loud to a partner before moving on.
⌨️ Get to Know the Keyboard
A keyboard looks like a lot of keys at once, but you only need a handful of them to get started. The most important row is the home row — rest your left hand's fingers on A S D F and your right hand's fingers on J K L ; and you can reach almost every other key without looking down.
Blue keys = the home row, where your fingers rest.
Try it: open any blank document or text box. Type your first name using only the home-row hand positions you just learned, then press Enter and type it again as fast as you can. Compare the two.
⌨️ Full Typing Guide — finger colors, a printable paper keyboard, and real practice
🖱️ Using the Mouse
Click
One quick press — selects something.
Double-click
Two quick clicks — opens something.
Right-click
Opens a menu of extra options.
Click & drag
Hold the click while moving — moves or resizes something.
📁 Saving & Organizing Your Files in Drive
Everything you make in this class needs a home, or it becomes impossible to find again on the day it's due. Every student sets up the same simple system:
- In your school Google Drive, click New → New Folder.
- Name it exactly
YourName — Digital Media Design. This is the only folder you'll need all year. - Inside it, everything you save should be easy to find later — use clear file names like
lastname_posterproject_v2, notUntitled document (14). - To turn in or share work: right-click the file or folder → Share → make sure your teacher is added, then hit Send.
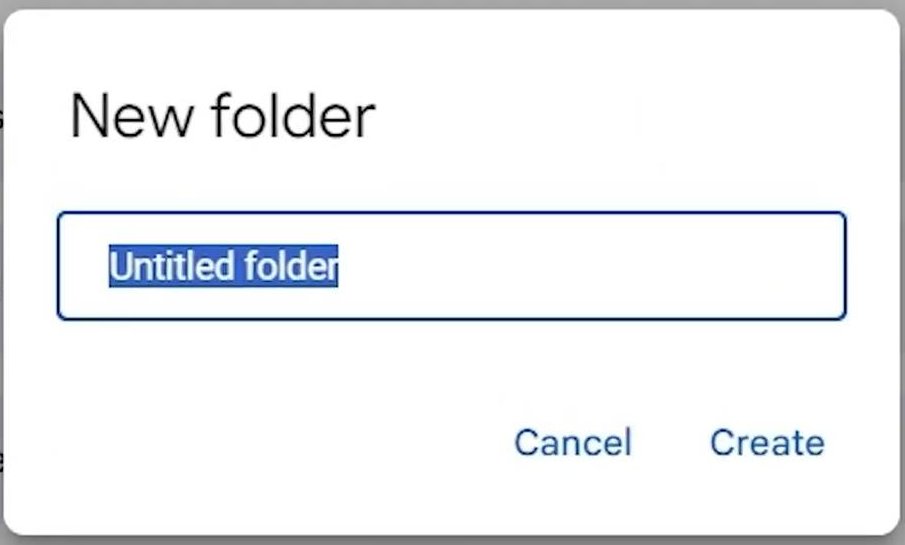
Step 1: New → New Folder. The default name is always "Untitled folder" — type over it right away, while it's still highlighted.
📧 Which email do I actually use for this?
To share or turn in one specific file (instead of a whole folder), right-click it and open More actions:
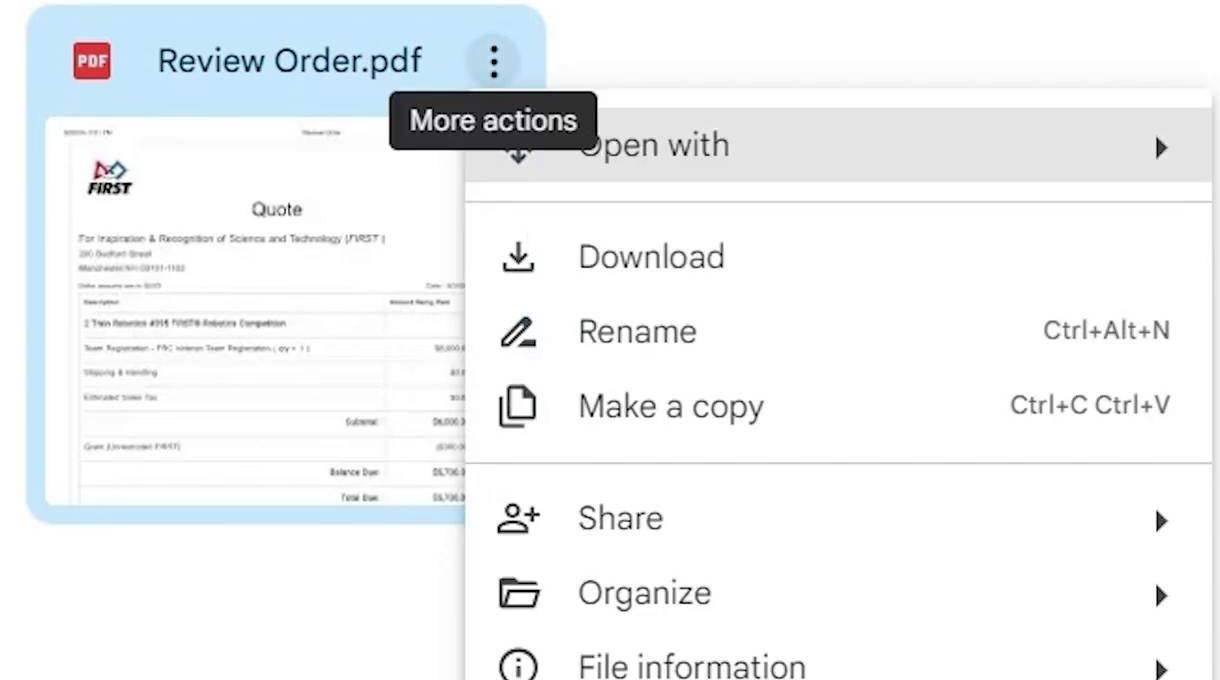
Right-click any file → this menu appears → Share. Rename and Make a copy live right above it, worth knowing for later.
Clicking Share opens one more choice worth understanding — General access controls who can open the file with just the link, before you've even added anyone by name:
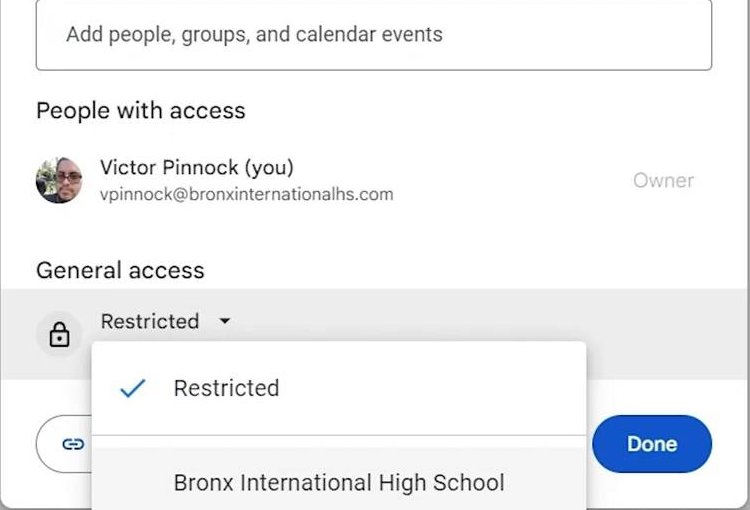
Restricted = only people you add by name. [Your school] = anyone signed in with a school account. Anyone with the link = truly public. Default to Restricted unless you have a real reason not to.
🏫 Using Google Classroom
Google Classroom is where every assignment, handout, and due date for this class actually lives — not paper, not memory. Two things to know before anything else:
- The first time you join a class, your teacher gives you a class code — a short string of letters and numbers, no spaces. Click the + in Classroom, choose Join class, and type it in exactly.
- Inside a class, three tabs matter: Stream (announcements), Classwork (every assignment, organized by topic), and People. Assignments never expire from Classwork the way an announcement can scroll away in the Stream — if you're looking for something due, check Classwork first.
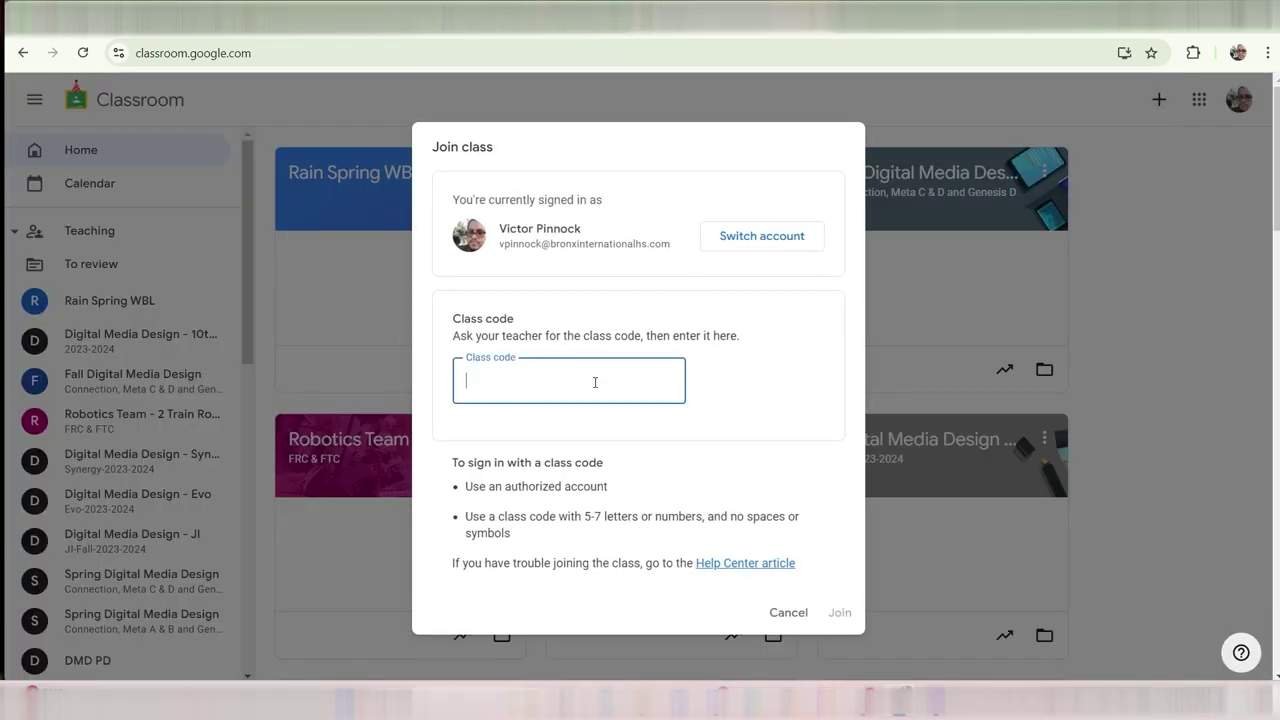
Joining a class for the first time: + → Join class → type the code your teacher gives you.
Turning in an assignment works the same way almost everywhere in Classroom: open the assignment, click Add or create, and choose where the file is coming from — usually Google Drive, since that's where Chapter 1 above already told you to keep everything.
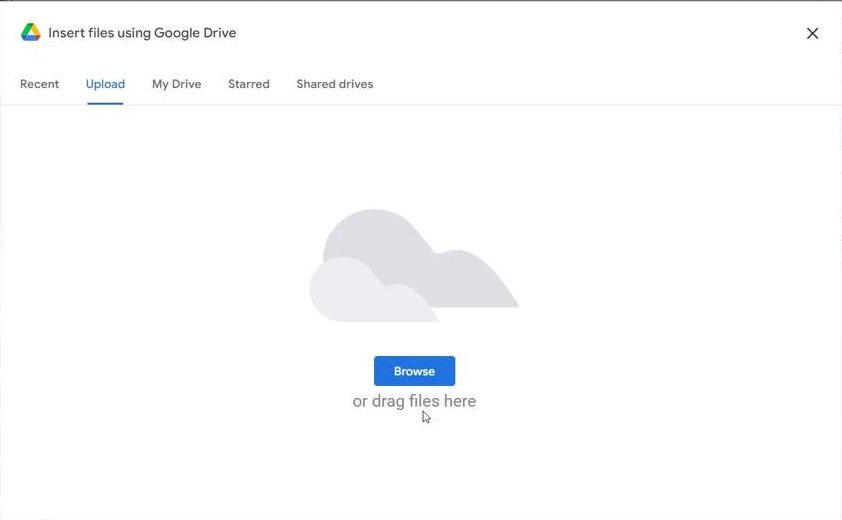
Attaching a file from Drive to an assignment — the same dialog appears anywhere in Google Workspace that lets you attach a file.
An assignment isn't turned in until you actually click Turn in (or Mark as done) after attaching your file — attaching alone doesn't submit it. Always double check the assignment shows "Turned in," not just "Assigned," before you consider it done.
💾 Storage & Removable Drives
The computers in this lab belong to the school, and anyone who uses one is technically sharing whatever's saved on it. Computers also occasionally crash or get wiped. That means protecting your own files is your job — your school Drive folder (above) is your main backup, but it helps to understand your other storage options too.
How storage size is measured — each unit is about 1,000× the one before it:
Rule of thumb: your Google Drive folder is where real backups live — a USB drive or SD card is just a convenient way to carry a file between computers, not a safe place to store the only copy of your work.
Learning Outcomes
- Identify and name the 4 main parts of a desktop computer setup
- Find the home row and the most-used keys on a keyboard without searching
- Click, double-click, right-click, and drag with a mouse
- Power on/off, log in, and basic file management (create, save, upload)
- Use a browser, open Google Drive, and upload a file
- Explain the difference between cloud storage (Drive) and removable storage (USB/SD), and name the basic units of storage size (KB/MB/GB)
- Understand what CTE is, program cycles at BIHS, and employability skills expectations
- Identify supports and accommodations available (IEPs, ELL services)
Accommodations & Accessibility (Common Exceptionalities)
- ELL: provide bilingual glossaries, simplified instructions, visuals, sentence frames.
- IEP / Learning Differences: extended time, step-by-step checklists, scaffolded tasks, one-on-one support.
- Attention-related: break tasks into short segments, progress checklist, minimize distractions.
- Visual/hearing impairments: provide large-print documents, screen-reader friendly versions, captions for videos.
- Motor impairments: provide alternative input methods (larger trackball mice, on-screen keyboards, adjustable click speed), allow extra time for mouse/keyboard tasks.
Lesson Activities (two 45-min blocks suggested)
- Meet Your Computer + keyboard/mouse basics, above (15 min) — label the parts, find the home row, practice each mouse action.
- Intro presentation: What is CTE? (10 min)
- Guided demo: Boot, log in, open browser, navigate Drive and classroom resources (15 min)
- Practice: Students upload a test file to Drive and share with teacher (10 min)
Additional micro-lessons:
Background reading (source slide decks):
Assessment
Checklist: student can name all 4 hardware parts, locate the home row, demonstrate each of the 4 mouse actions, and completes each basic task (login, upload, share); writes one-sentence reflection about a CTE career interest.